Want to charge users for access to your Telegram channel? SellGram lets you create a paid channel, set your subscription plans, and start accepting payments without building your own payment system.
In this guide, I’ll show you the exact process from applying for a SellGram merchant account to getting the subscription link you can share with your audience.
What is SellGram?
SellGram is a Telegram-based tool for selling access to paid channels and groups. You can create your own subscription plans, choose the price and duration, and let SellGram handle the payment and subscriber access.
You don’t need to build a separate checkout system or manually add and remove subscribers.
Before You Start
Before you start, you’ll need these three things:
- A Telegram channel or group you want to monetize
- Admin rights on that channel/group (so you can add other bots as admins)
- A SellGram merchant account.
Step 1: Apply to Become a SellGram Merchant
You need to become a SellGram merchant before you can create a paid channel. Open the link below in Telegram and submit your application:
Apply to become a SellGram merchant
Once your account is approved, start the SellGram bot. The main menu will show options such as Balance, Add Funds, Withdraw, Paid Links, Paid Channels, Bundles, and History.
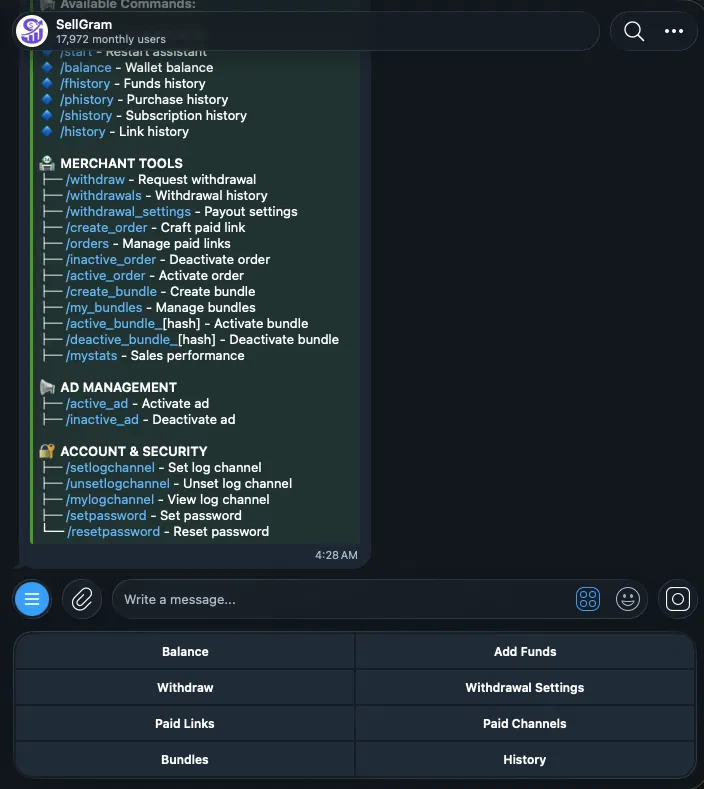
From this menu, tap Paid Channels to begin.
Step 2: Open the Paid Channels Menu
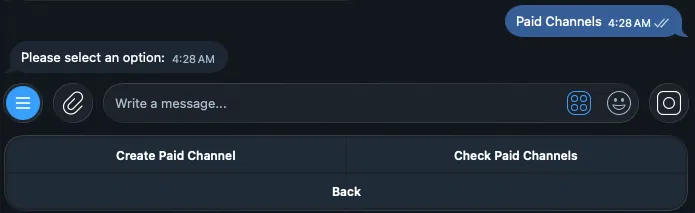
Tap Paid Channels. You’ll then see two options:
- Create Paid Channel — set up a brand-new paid channel
- Check Paid Channels — view and manage channels you’ve already created
Since we’re creating a new one, tap Create Paid Channel.
Step 3: Select or Forward Your Channel
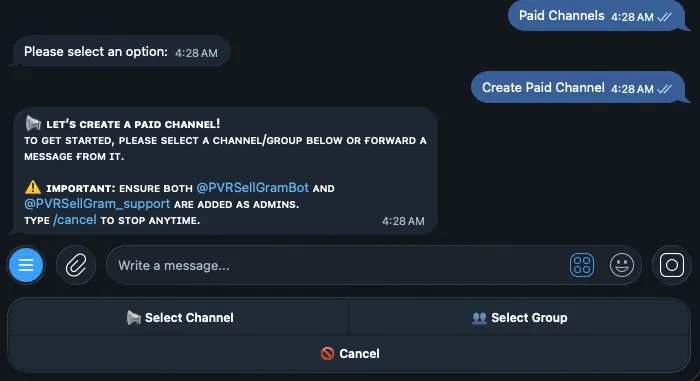
Before selecting the channel, add both of these accounts as admins:
@PVRSellGramBot@PVRSellGram_support
This is the step people skip, and it’s the one that causes almost every verification failure. If either bot isn’t an admin first, the next step won’t work and you’ll have to back out and redo it.
Once both bots are admins, tap Select Channel/Group and choose your channel. You can also forward a message from the channel directly to the bot.
Step 4: Verify Your Main Channel
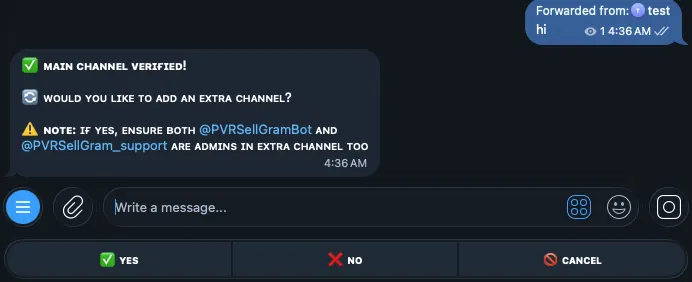
Once you select or forward a message, SellGram verifies it automatically and shows a “Main Channel Verified!” confirmation. It’ll then ask if you want to add an extra channel.
Adding extra channels is optional. You can link up to 4 additional channels to the same plan. This can be useful if one subscription should give users access to multiple channels, or if you want to keep a backup channel connected. If you add extra channels, repeat the same process for each channel. The two SellGram bots must also be admins in those channels.
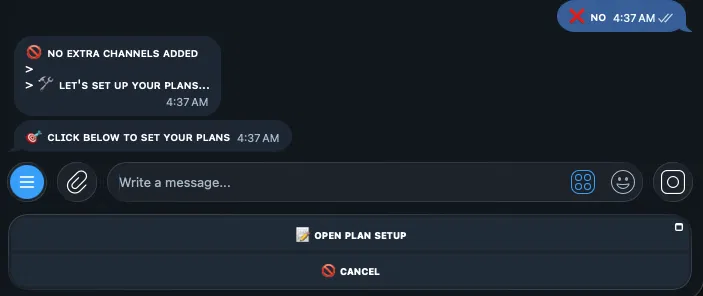
If you’re only selling access to a single channel, tap No.
Step 5: Move to Plan Setup
After you’re finished with the extra channels, SellGram will take you to the plan setup step. Tap “Open Plan Setup” to continue.
Step 6: Configure Your Subscription Plans
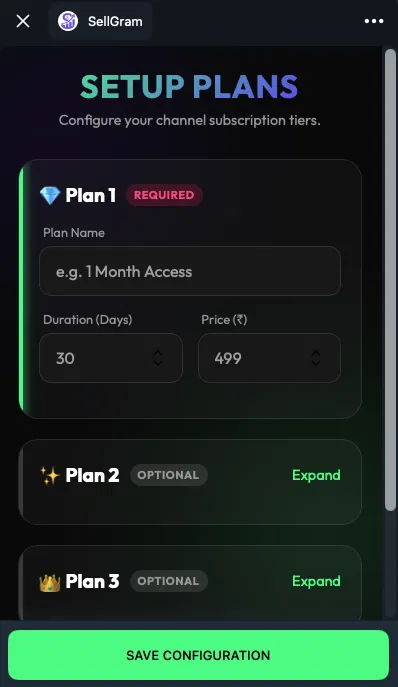
The Setup Plans form is where you create the subscription plans for your channel.
- Plan 1 (Required): Enter a Plan Name (e.g., “1 Month Access”), Duration in days, and Price in ₹
- Plan 2 (Optional): Add a second tier for example, a longer duration at a discounted rate
- Plan 3 (Optional): Add a third plan if you need another pricing option.
You can expand Plan 2 and Plan 3 to fill in their details, or leave them collapsed if you only want one plan. Once you’re happy with your pricing, tap Save Configuration.
Use a plan name that makes the duration or benefit obvious. For example: “1 Month,” “3 Months,” or “Premium – 30 Days.”
Step 7: Get Your Shareable Payment Link
Tap Save Configuration. SellGram will create the paid channel and show you its details, including:
- Channel ID — your channel’s unique identifier
- Ad Hash — a unique hash tied to your paid channel ad
- Plans — a summary of the pricing tiers you set (e.g., Silver ₹149 for 30 days, Gold ₹250 for 60 days)
- Backup Channels — any extra channels linked (or “None” if you skipped this)
- Share This Link — your unique subscription link (e.g.,
https://sellgram.in/channel/[your-ad-hash])
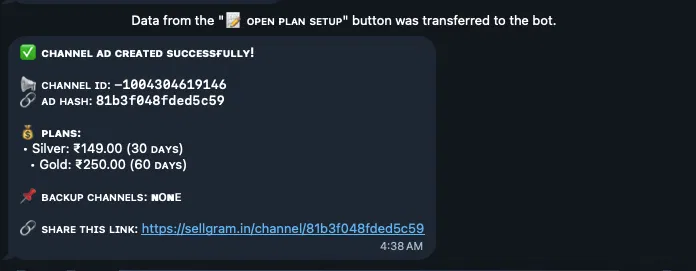
This is the link your users need to subscribe. Share it wherever you normally promote your paid channel. When someone opens the link, they can choose one of your plans and complete the subscription.
How to Take a Premium Plan Subscription (Buyer’s Guide)
Frequently Asked Questions
No. The entire process is done through Telegram’s chat interface and a simple form no coding required.
Up to 3 plans per channel one required, two optional.
Yes. You can connect up to 4 additional channels to the same plan, along with your main channel.
Channel verification will fail. Always add @PVRSellGramBot and @PVRSellGram_support as admins before selecting your channel.
Yes. You can edit the plan price, name, and duration later from the merchant dashboard.
Yes. You can add either a Telegram channel or group. You can also mix them—for example, use a channel as the main channel and add groups as extra channels.
If you run into an issue while verifying your channel or setting up your plans, leave a comment below with the step where you’re stuck.

